


Supply List:
- Large Plastic Easter Eggs or Paper Mache Eggs
- Rope – Varying colors
- Hot Glue Gun and lots of Glue Sticks
- Craft Scissors
- Black Cardstock Circles for the Bee Hive Hole
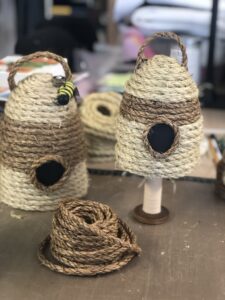
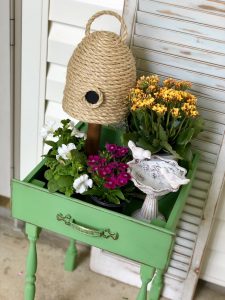
Add a touch of whimsy to your home with this DIY beehive decor! This project is perfect for the spring and summer months and only requires a handful of basic supplies. I will guide you step by step through the process of creating your very own beehive decor using nothing more than plastic Easter eggs, some rope, and lots of glue sticks. Experiment with different colors, sizes, and textures of rope to create a beehive that perfectly matches your unique style!
Creating Your DIY Beehive with Rope
First, start by gathering your Easter egg and your spool of rope. Quick tip – do not unravel your rope completely. Leave it in its spool because that will wrap around your egg much easier in that shape.
Take your egg apart. Set the top part aside and take the bottom of your egg and turn it upside down – we’ll be using this as a template. Start with the outer end of your rope spool. If it has a frayed edge, just take some hot glue and squeeze it together to keep that braid from coming apart.
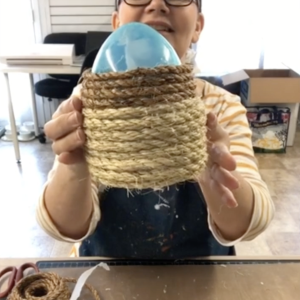
Take your rope and wrap it around the egg bottom to get that circumference. Remove the egg, and then just start wrapping that shape and hot gluing as you go. You want your rope to be coming up straight.
Once you have your rope wrapped up to about the height of the middle of your egg, place your egg inside the rope. At this point, you can start gluing the rope to the egg and shaping it into that dome shape. You can also add in a different color rope if you would like. Make sure you keep those transitions on the back of your beehive to hide them.
Once you have about the size of a quarter left at the top, you will finish it off. Load that area with hot glue, twist the end of your rope around, and shove it in that hole. Hold it for a moment to make sure it really sticks and doesn’t start unfurling.
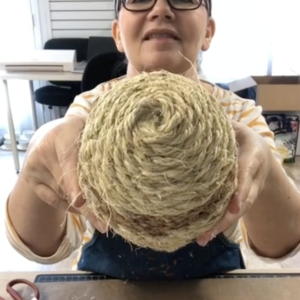
If you have any gaps in your beehive, feel free to cut off little pieces or frays to fill in those empty spaces.
Adding Embellishments to Your Beehive Decor
Take your black cardstock and cut out a circle for your beehive hole. I’m using a circle punch to get my circle to the exact size that I want. I am going to wrap the darker piece of rope around my black circle. Just add hot glue around the edges of your circle and attach your rope. Then simply hot glue the hole onto your beehive.
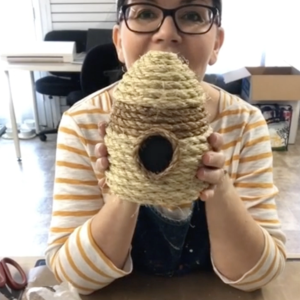
Feel free to add extra embellishments like bees or butterflies at this point. I think these look super cute with a handle, so I’ll be adding one to mine. Cut your rope to size and make sure you cut the rope at an angle, so it meets the curve of the beehive. Hot glue it to your hive and enjoy your little decorative handle!
You can display these anywhere! I like to display mine on an old spool or candlestick holder to create a little riser. With just a dash of creativity and a few simple materials, add a delightful and nature-inspired touch to any corner of your home.
I go LIVE on my Facebook page every Friday at 11 am CST for a fun and easy Craft-n-Chat Session. Come learn something new while creating something beautiful!


0 Comments